| Author |
 Topic Topic  |
|
B112
USA
5257 Posts |
 Posted - 08/01/2009 : 15:05:48 Posted - 08/01/2009 : 15:05:48


|
quote:
Originally posted by Leroy
My idea would be to epoxy truck ratchet straps to the entire underside of the tank hold. Then using a simular bracket attachment with beefy screws because they will bend, on the ends on those straps to bring tension to the top of the tank. 4 straps epoxied and overlaped on to the top of the tank. I will try and hand draw wat i am talking about and and share it, later.
I think I know what you're talking about. I thought the same thing about load straps, but people are telling me they will stretch. I'd say load straps would be easy and I use them all the time hauling tractors. Problem is once I put the floor in, I'll never know if the straps loosen, until the gas tank bangs on the floor. |

Michael |
 |
|
|
Leroy
USA
413 Posts |
 Posted - 08/02/2009 : 19:17:09 Posted - 08/02/2009 : 19:17:09


|
quote:
[i]Originally posted by B112
I think I know what you're talking about. I thought the same thing about load straps, but people are telling me they will stretch. I'd say load straps would be easy and I use them all the time hauling tractors. Problem is once I put the floor in, I'll never know if the straps loosen, until the gas tank bangs on the floor.
The stretch is not an issue.
Method of providing for stretch and making a tank tie down insert for the tank hold.
Determine space gap available between the tank and the floor ,and tank to the wall, up to the top edge of the tank.
Balled up bread, minus the crust, taped to the tank at the bottom and sides will provide a rough estimate gauge of support needed.
On your tank, duplicate that gap measurement with marine plywood strips not much wider than the 2” ratchet straps, so the plywood layer stack up will simulate the gap to tank from the wall in the hold.
Dry fit the tank using ratchet straps holding the marine plywood spacers.
Put lines on the straps to indicate equal lengths of overlap on the top of the tank.
(note)The sides may interfere with installation if they do omit them if necessary for the dry fit. The
Shims must fit without the tank teetering.
Those pieces omitted will need to be fished in after installation, but not in resin, or service to the tank in the future will be a destructive event.
If you have that bottom portion of the straps aligned and functioning in the dry fit stage, draw lines around your straps while still on your tank with a sharpie marker.
Measure those areas and document the spacing and web width of the strap material your using.
Then you can transfer the strap position to the same location in the tank hold area.
With those lines you will be able to measure and locate the places in the tank hold area that will need beefing up.
Someone who has laid down marine fiberglass for profit should be included in this beefing up.
Amateur efforts in doing this job may cause lumps and air pockets along with many other potential hind sight-oversights.
If I were doing it,
I would prep the area to be beefed up (sanding)and apply a first layer of fiberglass then coat the strap by immersion in the resin ensure the air bubbles are minimized.
The strap is then soaked in resin and squeeged of excess material and placed on those marine plywood strips An experienced glasser would know the working life of the resin and at what point the tack is just right to place the strips.
Also how best to prep the strips of marine plywood for this application.
Those strips should be toward the tank and the straps toward the tank hold .
Place beeswax or tin foil in between the lines on the tank so while pre stretching of the straps the marine plywood won’t stick to the tank.
I have not presented timing for each of these events but the timing is critical per the resin used.
Put the strap in a ratchet and apply tension to stretch the strap. Allow the strap to cure in this position.
Repeat the process for added straps.
After the straps are cured remove them from the tank.
Coat the hold areas and the straps with rosin, receptive epoxy.
Install, pressing out excess material where present.
An ink roller would work well for this.
After cured, I would put a layer of shoe goo, on the plywood strips, also rolled out so it is equally distributed.
On installing the tank, onto the shoe goo-ed plywood squirting windex on the shoe goo prior to install will make the tank slip in tight and fast. The windex will dry and the shoe goo will eliminate vibration caused abrasion to the bottom of the tank.
Fastening the straps on the top will require a solid knurled stainless rod with two backing plates made of thick sectioned pipe that match the diameter of the rod.
Three holes per strap end matching the holes in the clamp.
Rubber mudflap conveyor belting could lay on top of the tank and provide protection from the strap clamp to tank damage.

The strap is not stiff my pencil is and it has a hard time with radius's. |
 |
|
|
Leroy
USA
413 Posts |
 Posted - 08/03/2009 : 00:35:12 Posted - 08/03/2009 : 00:35:12


|
On the allthread it is possible to use a long bolt. Using the allthread initially will take out the slack. From there you will be able to determine if you can get a bolt long enough.
This approach is not necessarily easy but it one of my ideas. |
 |
|
|
Leroy
USA
413 Posts |
 Posted - 08/03/2009 : 00:38:33 Posted - 08/03/2009 : 00:38:33


|
I used a program called micrografx to attempt to draw it digitally.
I would have used up another day getting it perfected. That is why there are good circles. |
Edited by - Leroy on 08/03/2009 00:38:50 |
 |
|
|
B112
USA
5257 Posts |
 Posted - 08/16/2009 : 16:49:09 Posted - 08/16/2009 : 16:49:09


|
Update: A weekends work moving the gas tank project along. My friend is painting this for me who's painted his boat and invested in a respirator system to protect the lungs.
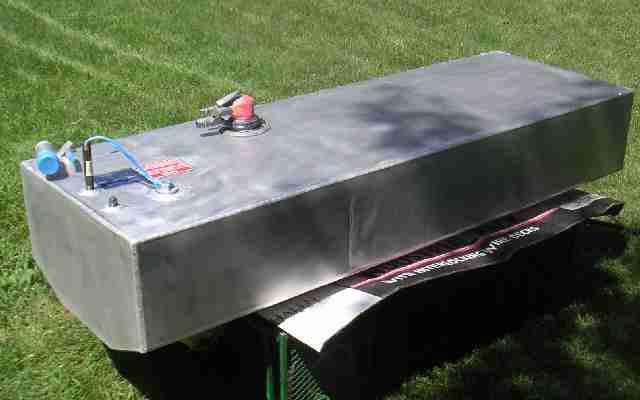
Well this is the new tank ready for painting (scuffed up w/300 grit and acetone cleaned):

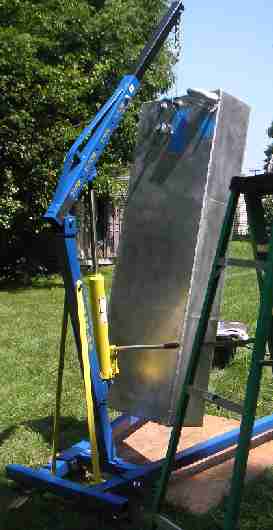
Setup for painting:

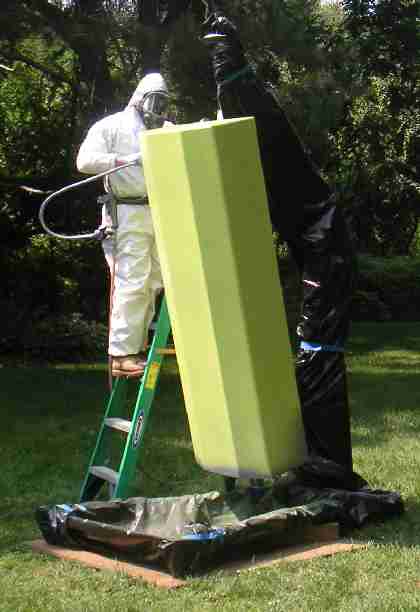
Primed with Awegrip primer being coated with a grey topcoat:

Final tank ready for installation:

|

Michael |
 |
|
|
B112
USA
5257 Posts |
 Posted - 08/16/2009 : 16:58:17 Posted - 08/16/2009 : 16:58:17


|
quote:
Amateur efforts in doing this job may cause lumps and air pockets along with many other potential hind sight-oversights.
Leroy-
Thank you for this detailed explaination, I agree with the amateur efforts issue. I'm currently seeking some estimates for some work. That is a slow process because folks have enough work here. The bad shops may be a bit more hungry. I'm trying to do and learn as much as possible and not rushing any part of this project. I've already been raked over the coals on some of this and it's just not worth it. I could buy three of my boats for what I've got into this boat. That could be somewhat similar in tractor projects too! |

Michael |
 |
|
|
Leroy
USA
413 Posts |
 Posted - 08/16/2009 : 23:46:33 Posted - 08/16/2009 : 23:46:33


|
quote:
Originally posted by B112
quote:
Amateur efforts in doing this job may cause lumps and air pockets along with many other potential hind sight-oversights.
Leroy-
Thank you for this detailed explanation, I agree with the amateur efforts issue. I'm currently seeking some estimates for some work. That is a slow process because folks have enough work here. The bad shops may be a bit more hungry. I'm trying to do and learn as much as possible and not rushing any part of this project. I've already been raked over the coals on some of this and it's just not worth it. I could buy three of my boats for what I've got into this boat. That could be somewhat similar in tractor projects too!
Taking your time is wise money, sure enough.
Was that paint water based? |
 |
|
|
B112
USA
5257 Posts |
 Posted - 08/17/2009 : 04:53:01 Posted - 08/17/2009 : 04:53:01


|
quote:
Was that paint water based?
It's AwlGrip's AwlCraft 2000, a two component fast drying acrylic urethane coating. $100/gallon.
http://www.awlgrip.com/ |

Michael |
 |
|
 Topic Topic  |
|
|
|

